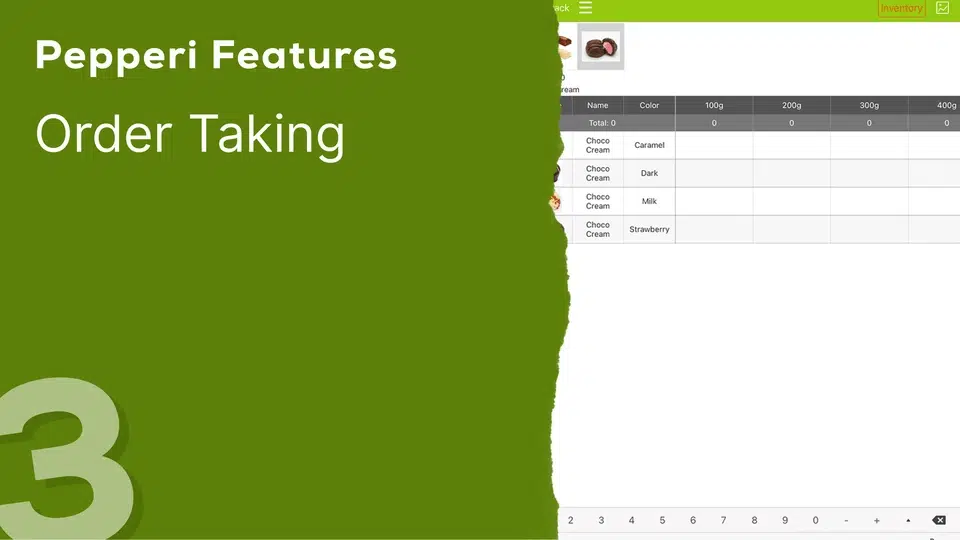


4 – Checkout Cart
After adding all the products to the order, simply click on the ‘CART’ icon to access the checkout screen.
This is an example of an order checkout page. Data fields can be added or changed in the Back-Office to suit your requirements. More columns can be added and can be viewed by scrolling to the right. This is also a good solution to hide certain fields you wouldn’t want your end customers to see.
For fields such as Discount or Price, you can allow your Reps to make changes, up to a pre-defined limit.
Obviously, any change the Rep makes when closing the order, will impact the total price, potentially altering any promos or special discounts.
For example, if the Rep reduces the Quantity of an item from 10 to 8 – such as in row 3 – the order which previously qualified for the Promo “Buy 10, get a 5% discount, no longer meets the criteria and the special discount is automatically removed.
Clicking on the 3 dots in the lower left-hand corner will take us to the order logistics page. Here, reps can select and view details including: delivery address, where the customer may have several different locations, delivery method, and date. Business rules can be defined, such as, “Orders placed before 12 noon being scheduled for next day delivery.”
Clicking the ‘Pen’ icon leads to the Order Signature window.
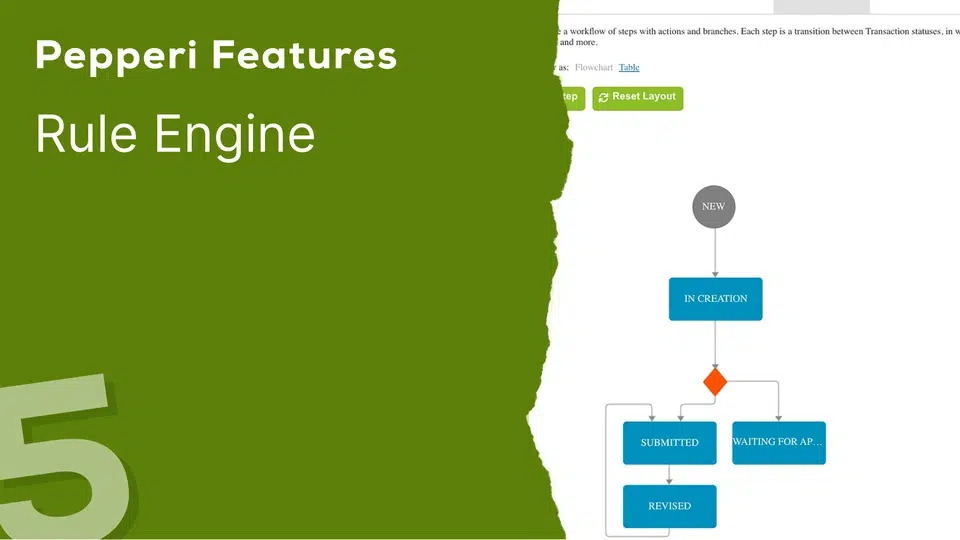
When clicking the ‘Direction’ icon next to “Submit”, the order can be either sent for manager approval, saved as a draft, paid online – these options and many more – can be configured in the Pepperi Rule Engine.
To find out more about Pepperi’s sophisticated Rule Engine, watch the dedicated video clip.
Sign up to our newsletter